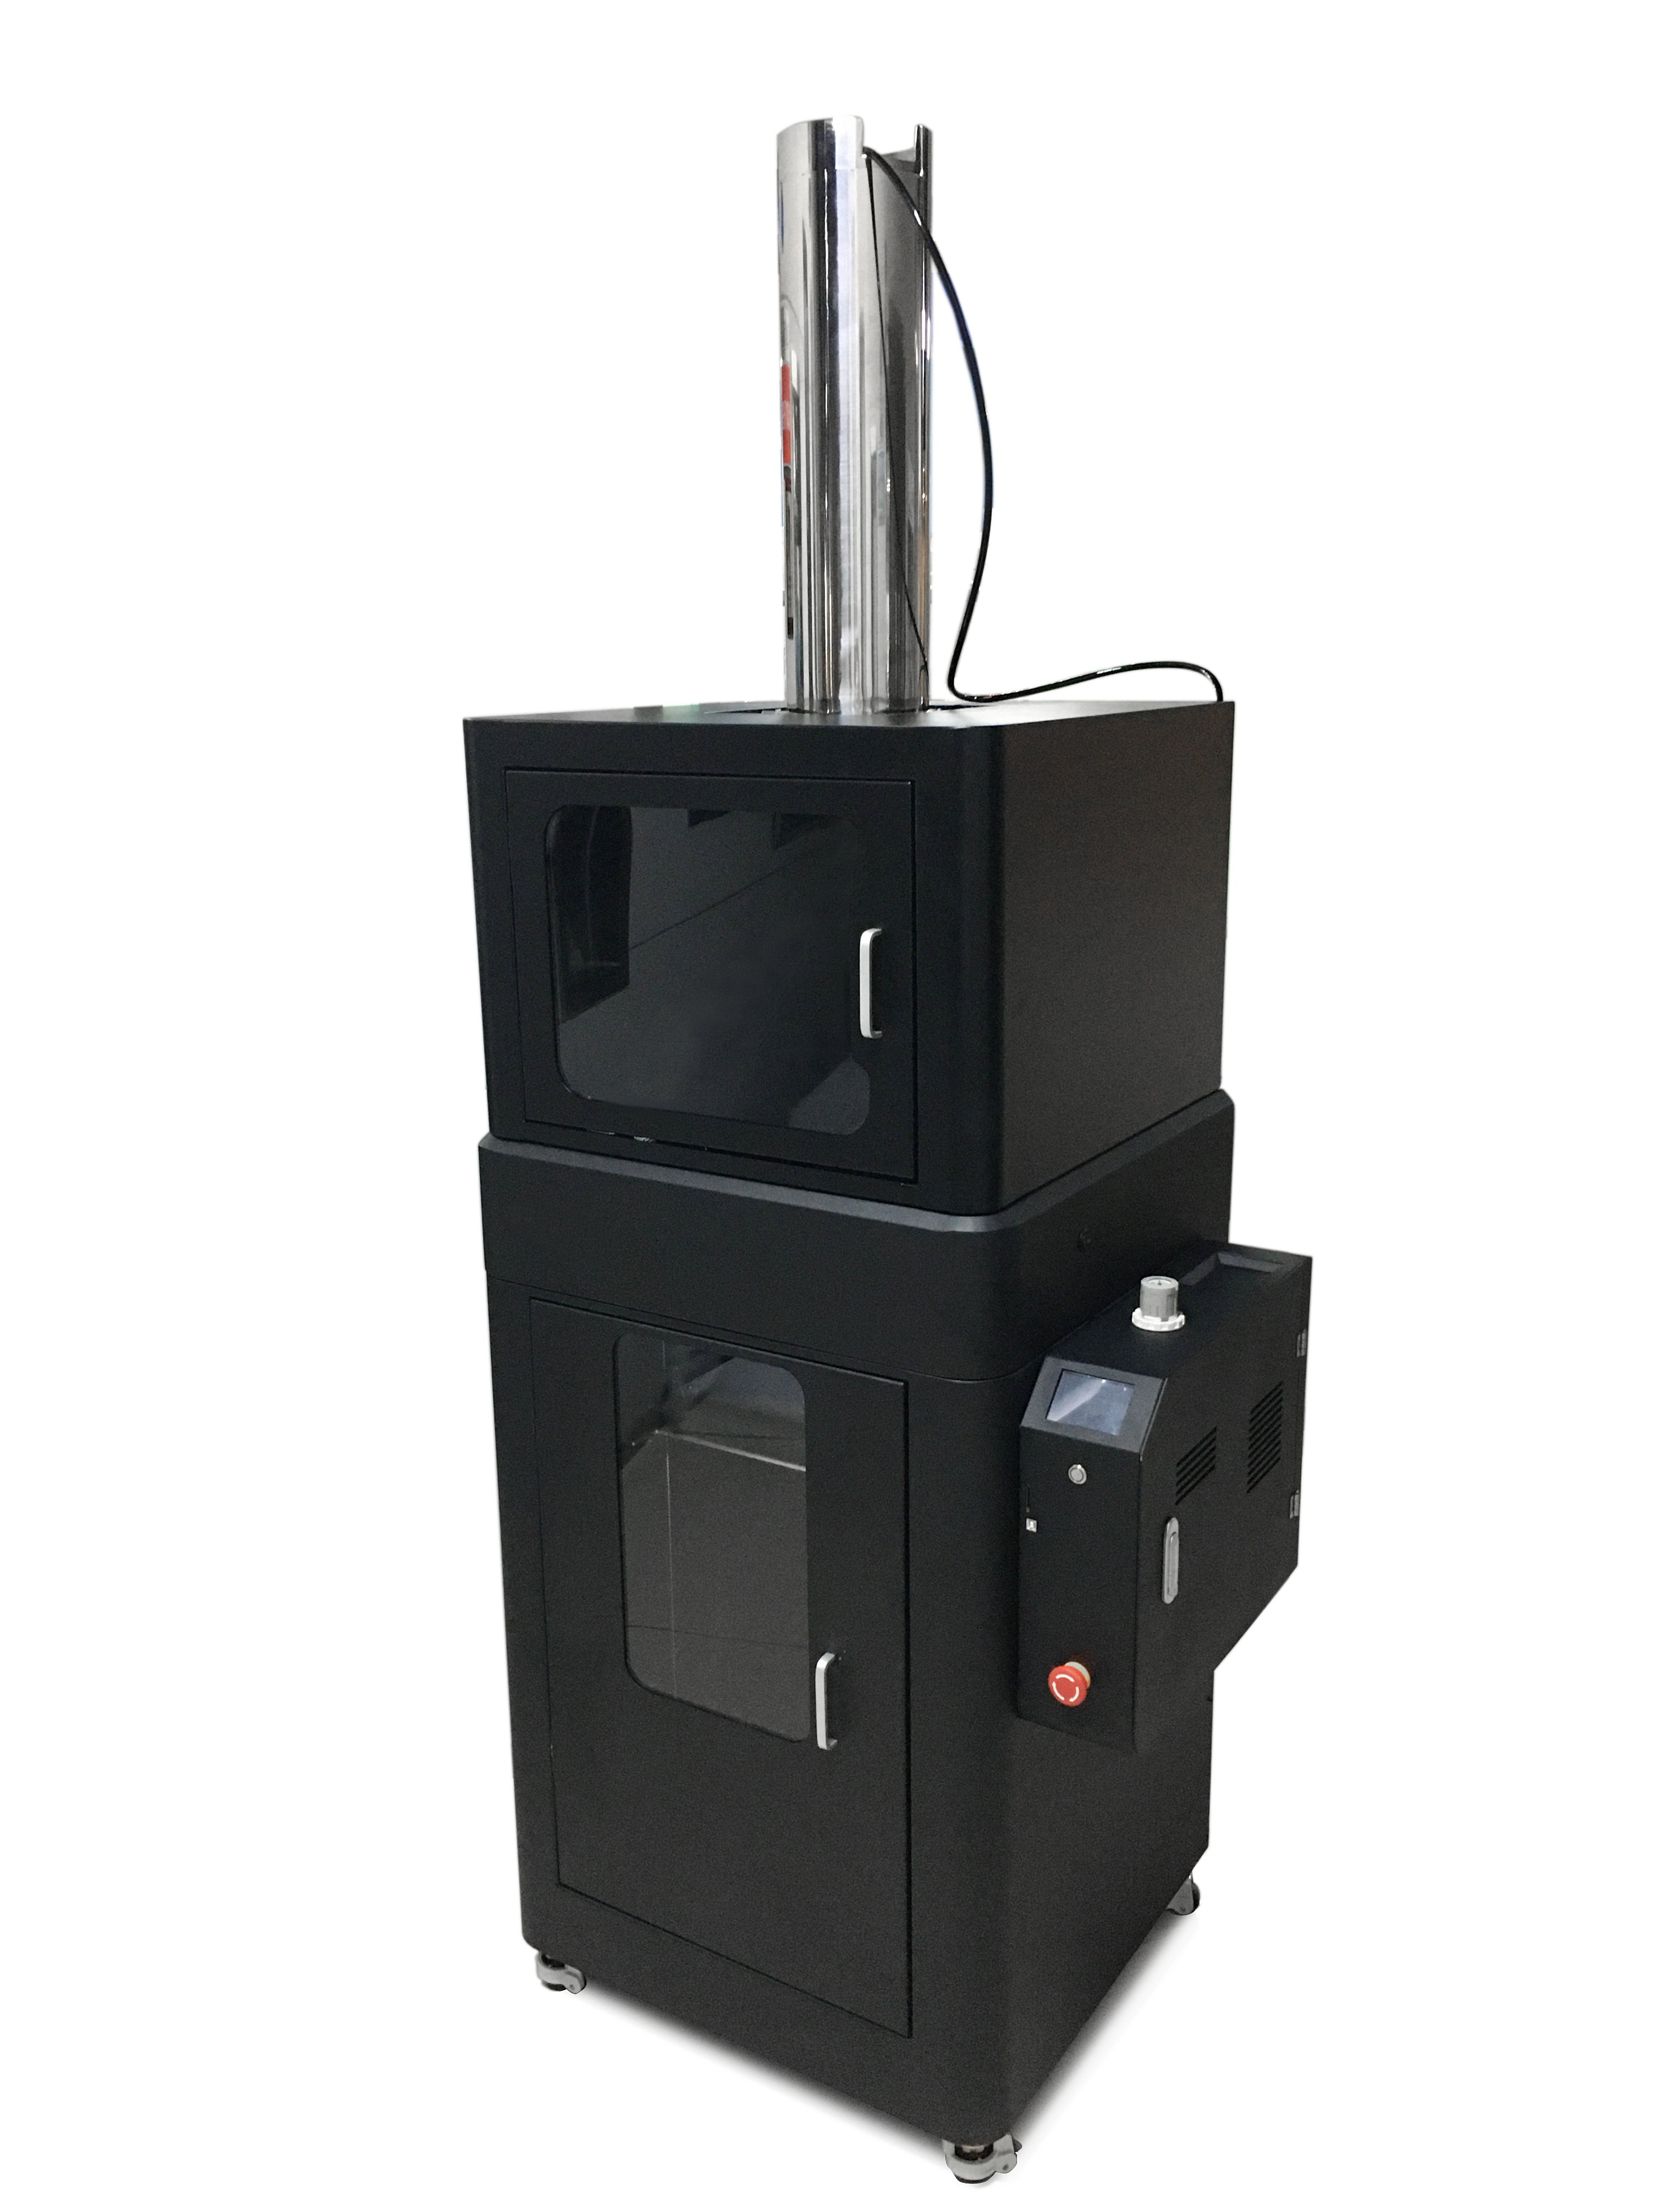
Clay 3D Printer Installation
- Suitable for - ZCC3040 ZCC4060 ZCC5080 model
- Check the appearance of the equipment for any damage. Please use a 3mm hex wrench to remove the built-in handle and reinstall it on the outside.
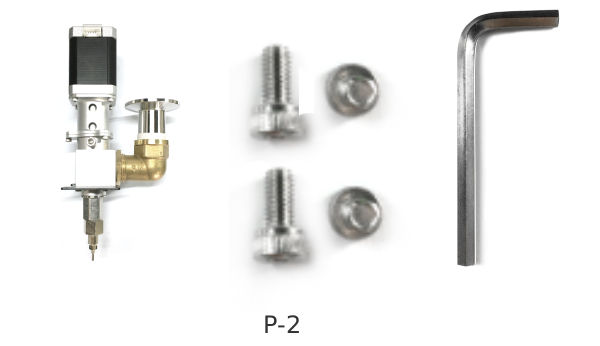
- Use (Figure P-2) parts and tools to install the extruder assembly.
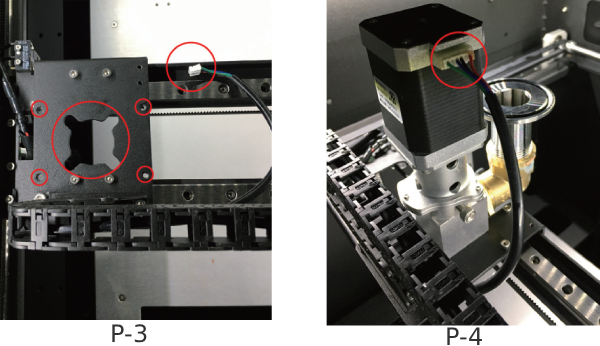
- Place the extruder into the fixed plate on the equipment slide. (Figure P-3)
- Tighten and secure with screws, and insert the wires. (Figure P-4)
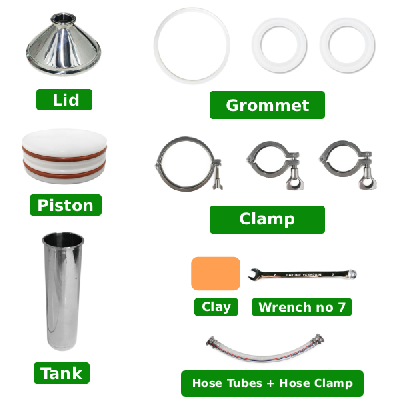
- Install the material bucket (Fig. P-5)
-
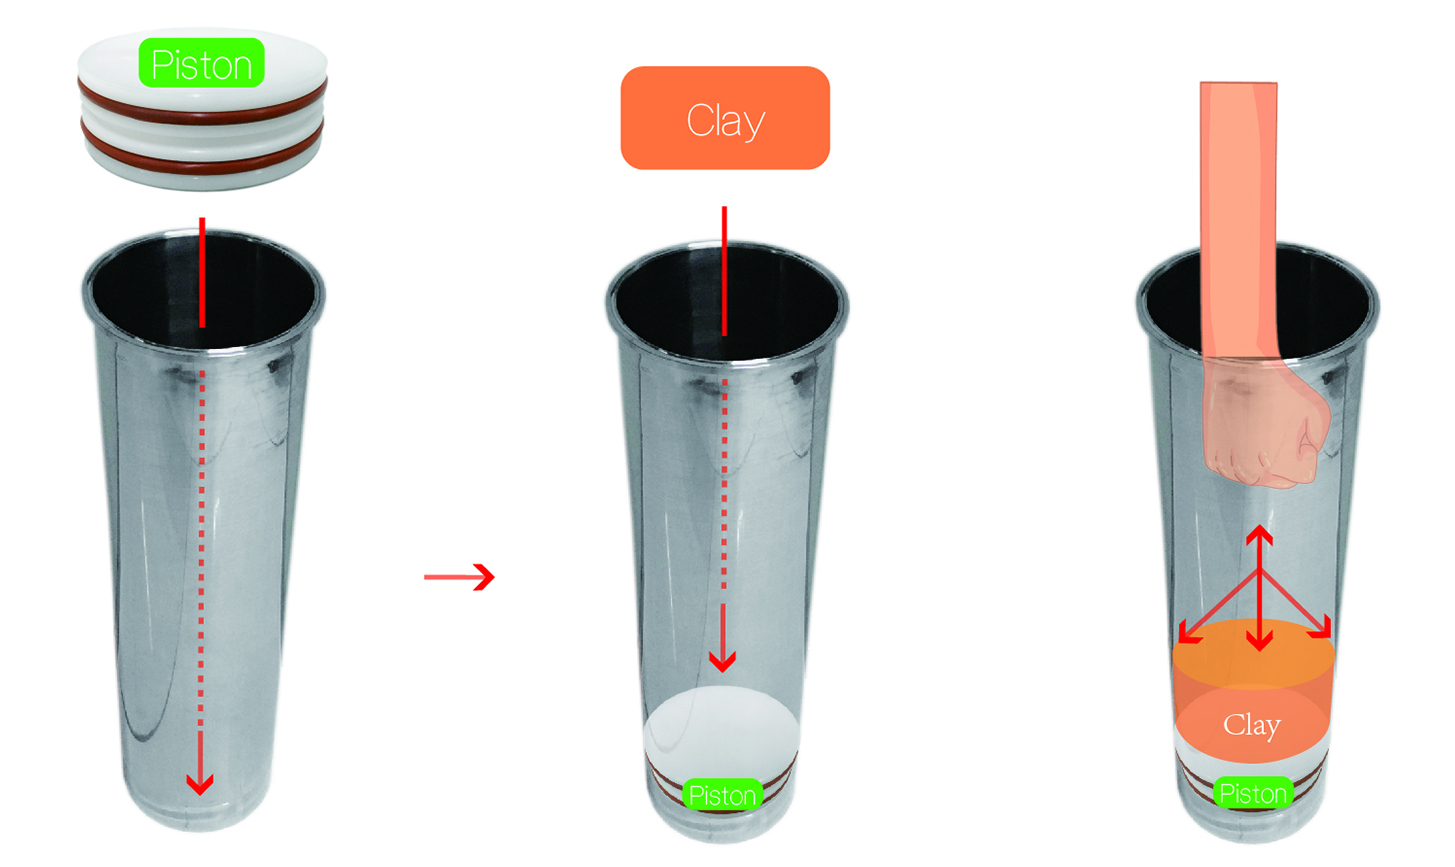
Tank filled clay
- Press the piston into the bottom of the tank ; and put them into the tank ;
- Rub the clay into block;
- Press the clay into place,by hand and repeat this step until the bucket is full.
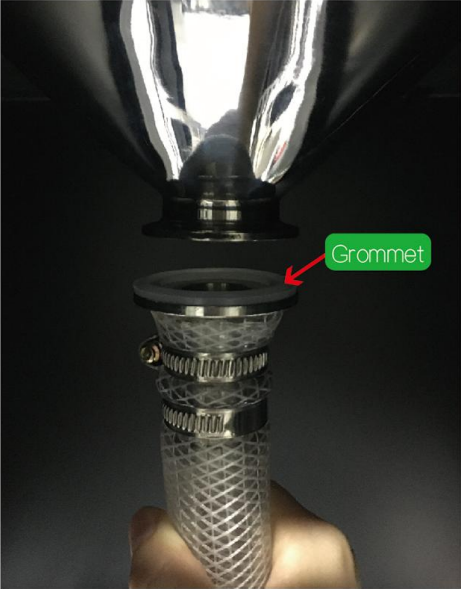
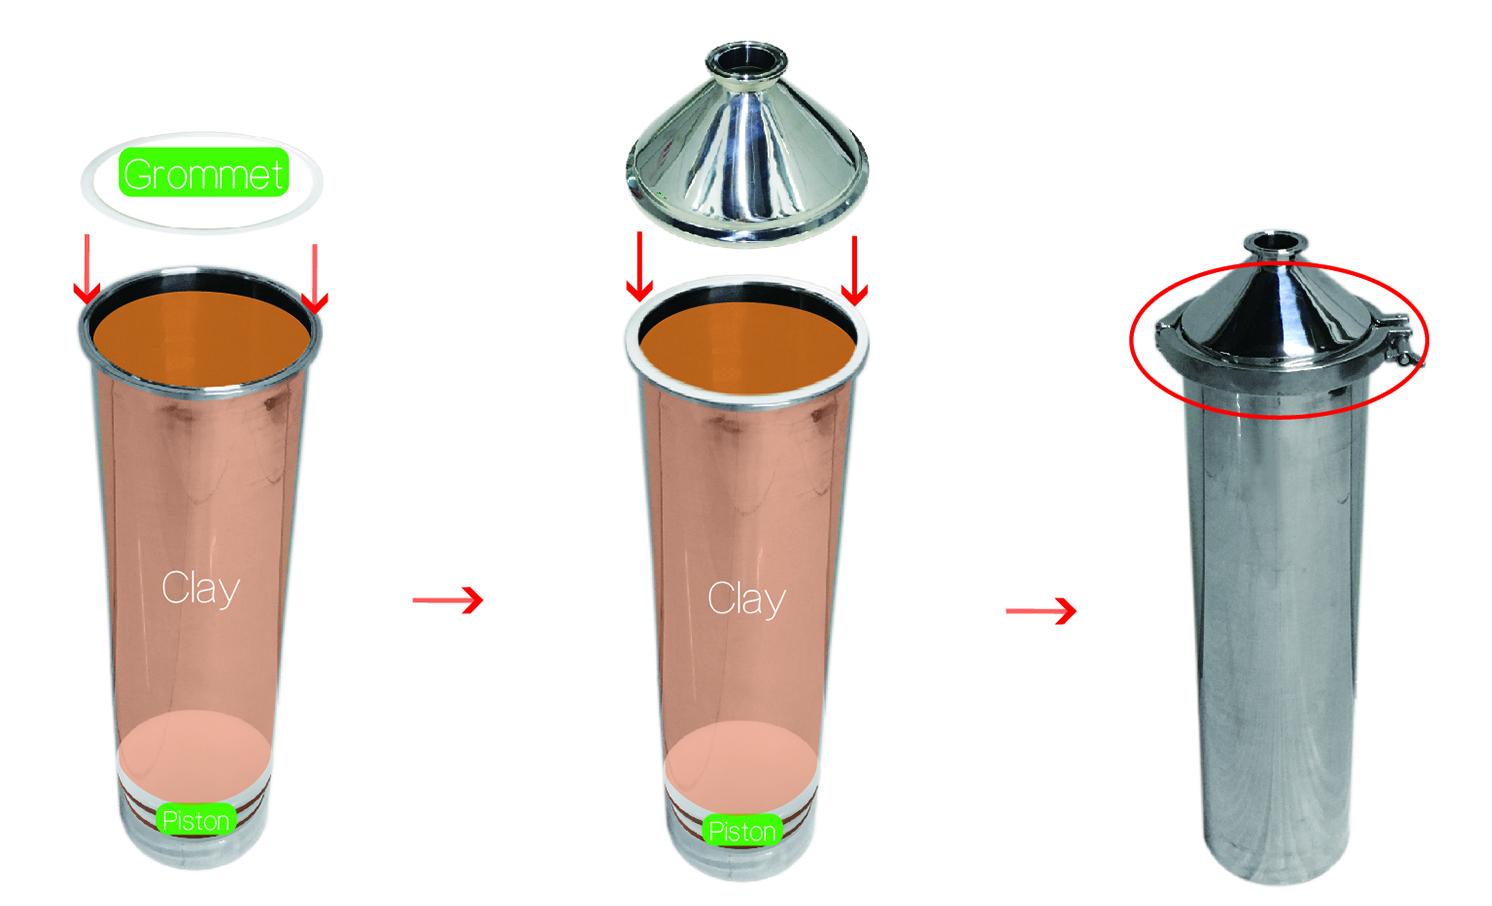
- Clean the barrel mouth and place a large washer on it;
- Put on the material cove;
- Finally, lock the cover tightly with a large clamp.
- Invert the bucket filled with mud and place it in the hole of the material rack. (Fig. P-6)
- Insert the air pipe of the material rack into the air inlet of the material tank. (Fig. P-7) Final effect. (Fig. P-8)
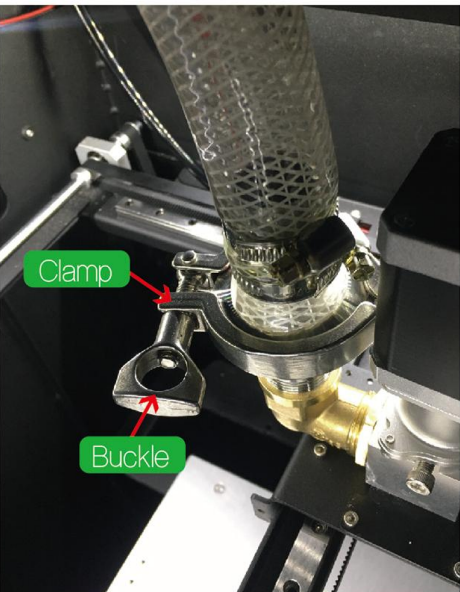
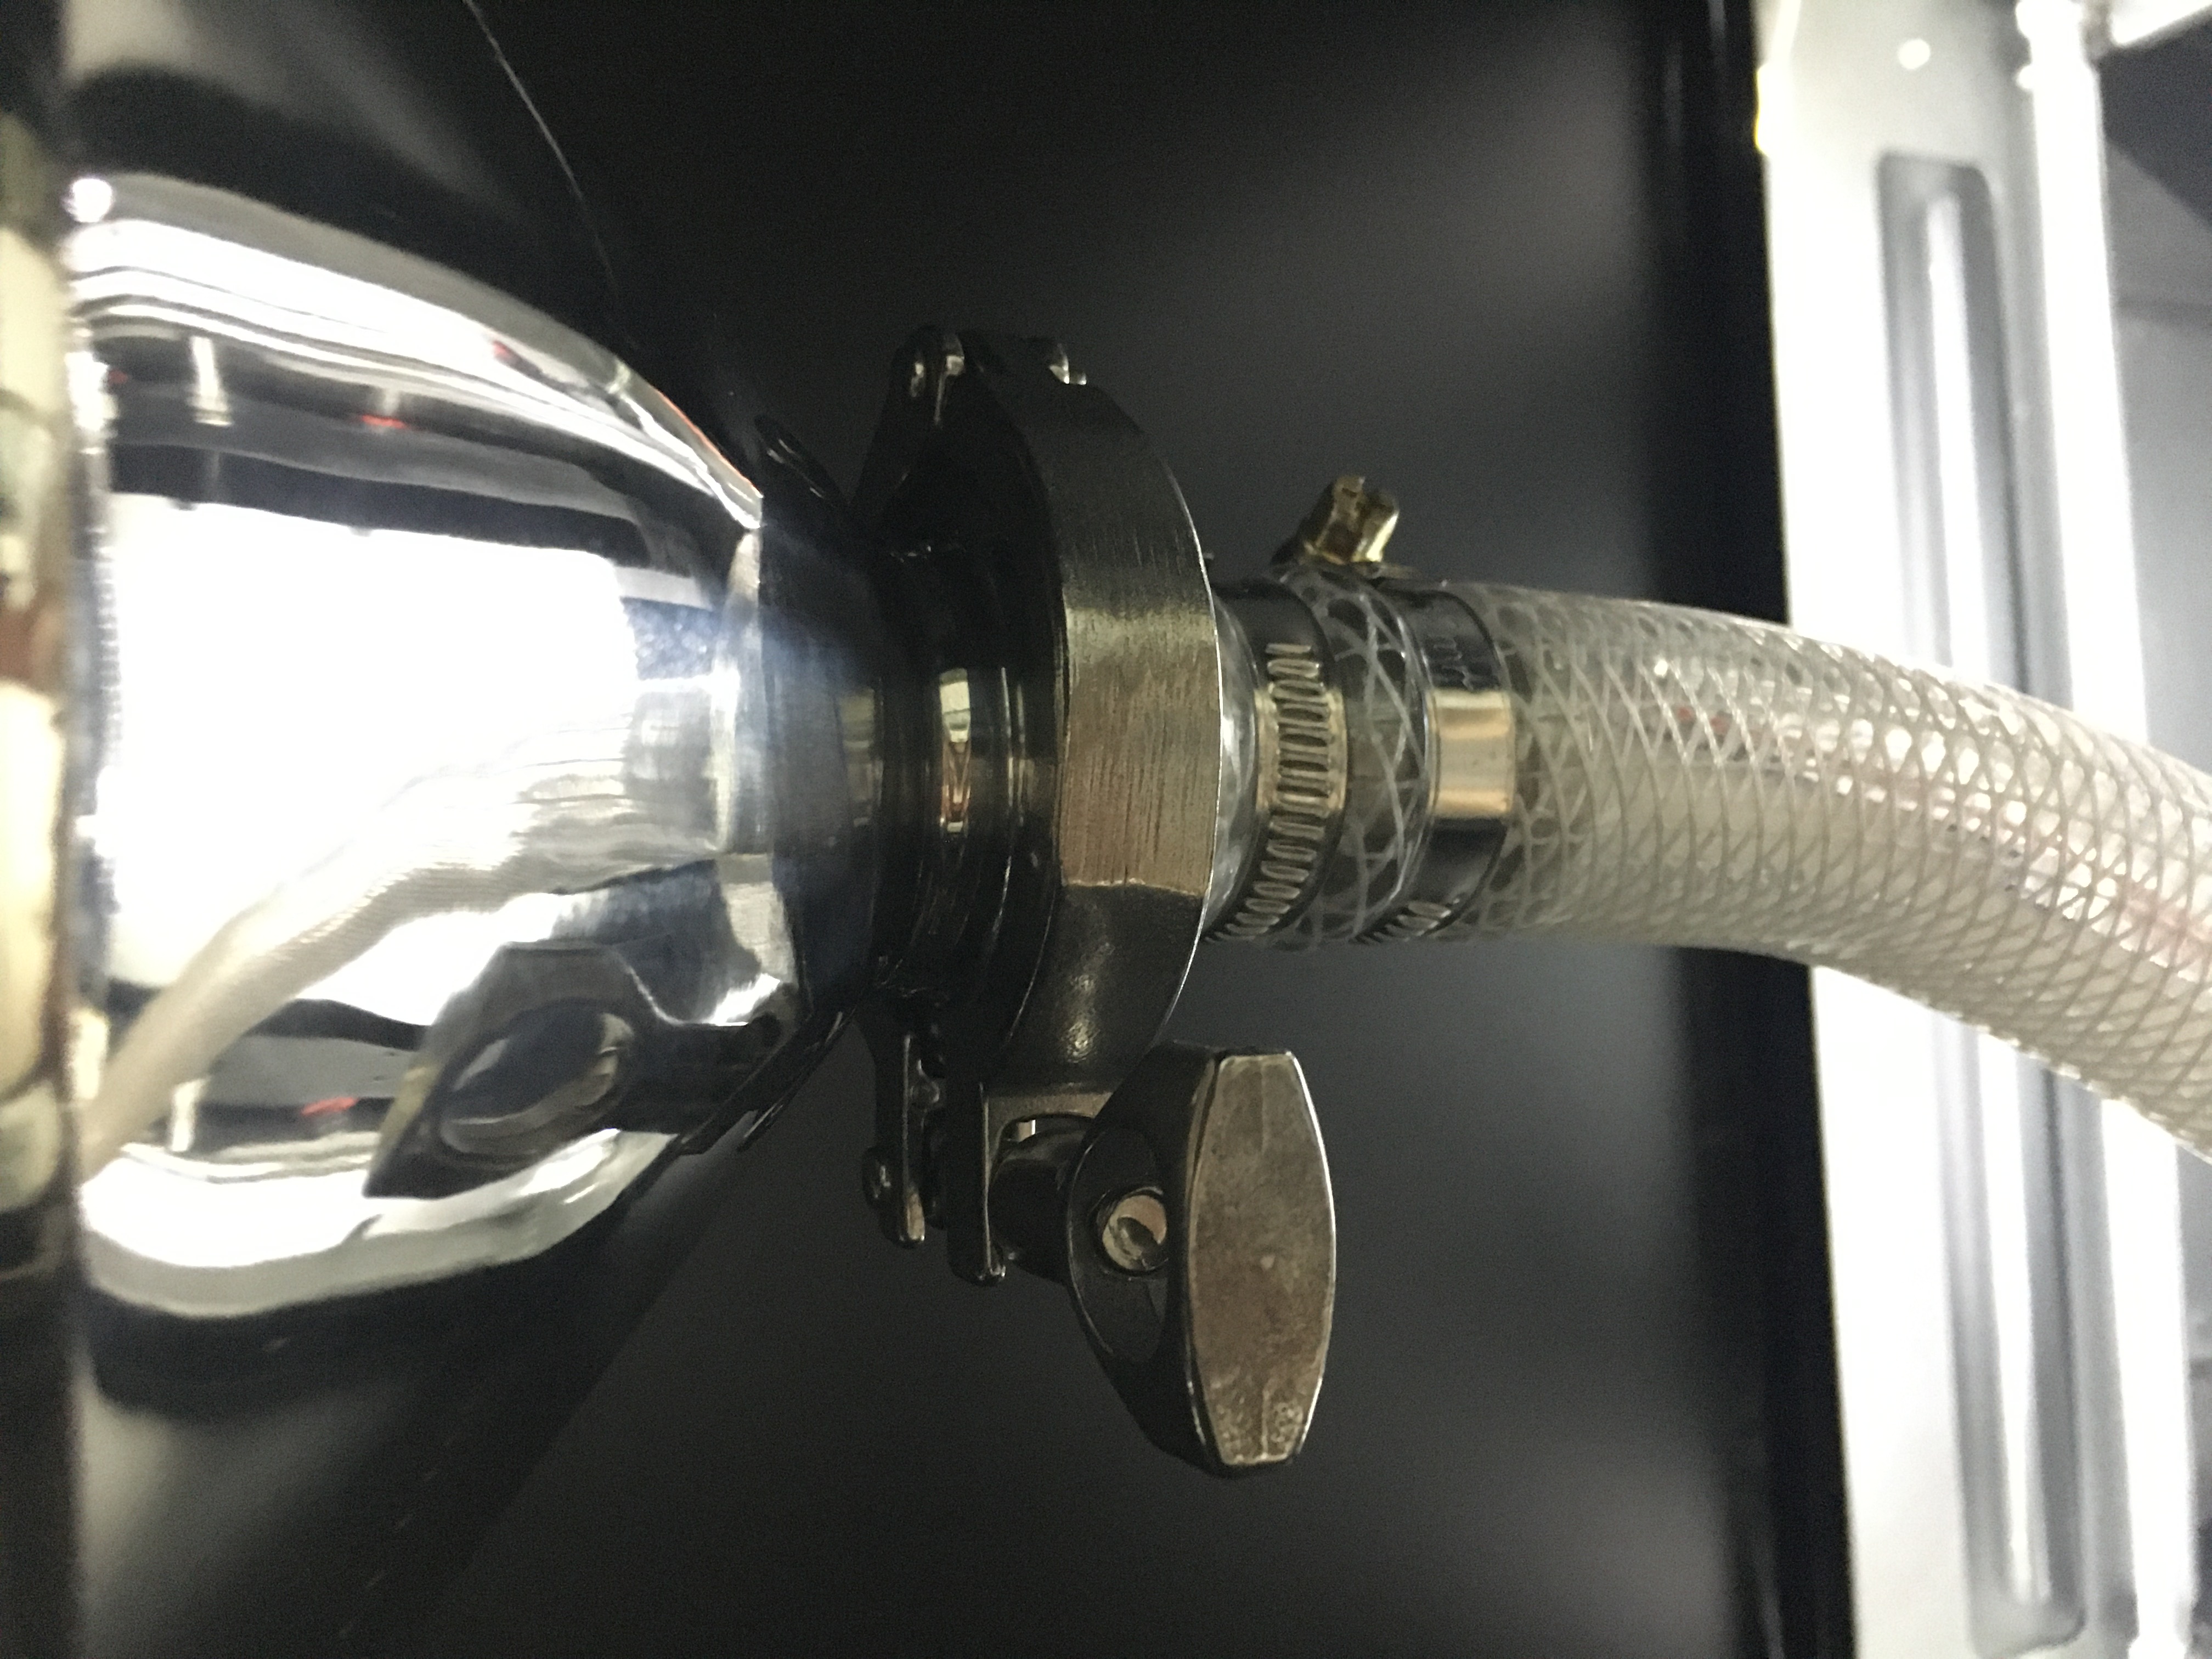
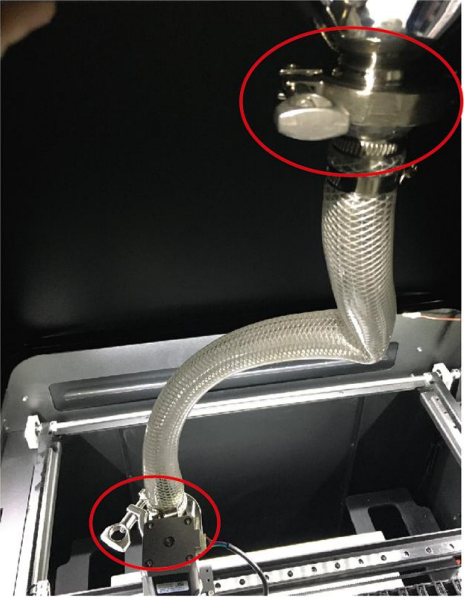
- Place small washers on each connection port, lock them with small clamps, and finally use a No. 7 wrench to insert the buckle and tighten them tightly.(Fig. P-9 P-10)
- Open the material rack door and use the feed pipe to connect the mud outlet of the material cover with the feed inlet of the extruder component(Fig. P-11)
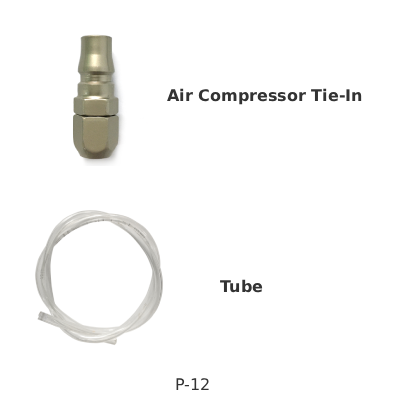
- Connect the air pressure. (Fig. P-12)
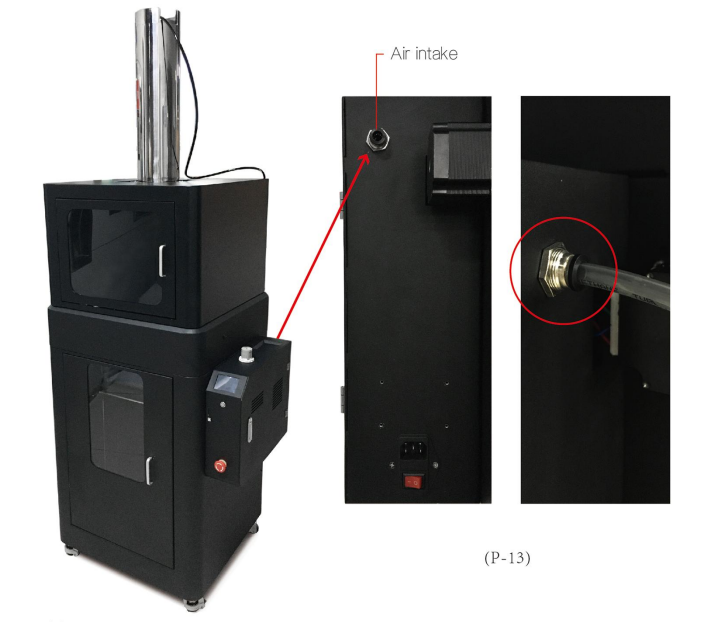
Operate while the air compressor is not running - Insert one end of the air hose connector into the air compressor and the other end into the right air inlet of the equipment. (Fig. P-13)
- Connect to the power supply.(Fig. P-14)
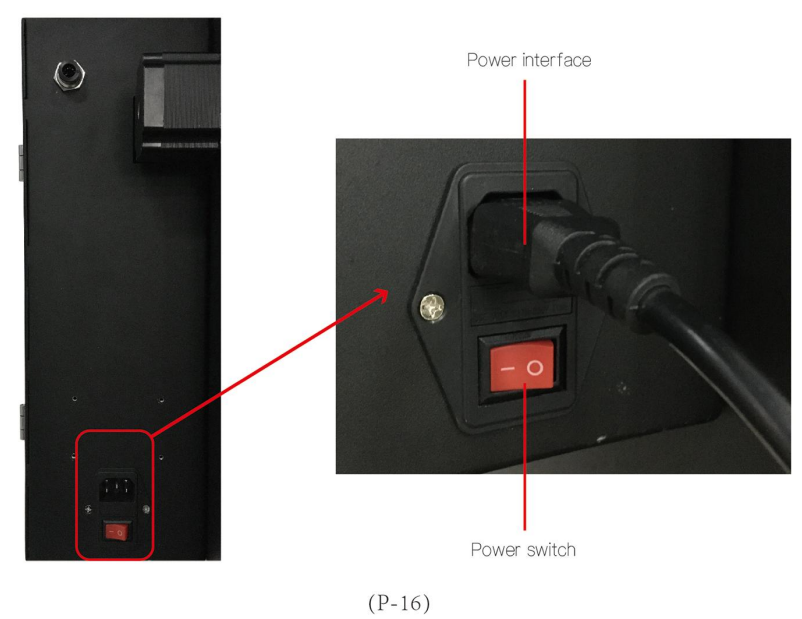
- Insert the power cord into the power interface behind the power distribution cabinet on the right side of the machine. (Fig. P-16)
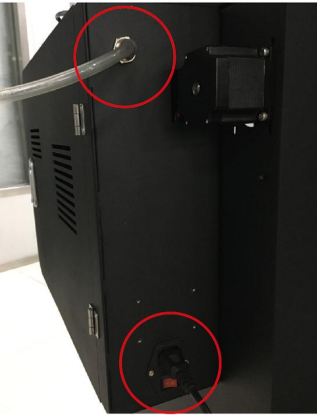
- Turn on the power switch after inserting the wire. Final effect. (Fig.P-15)
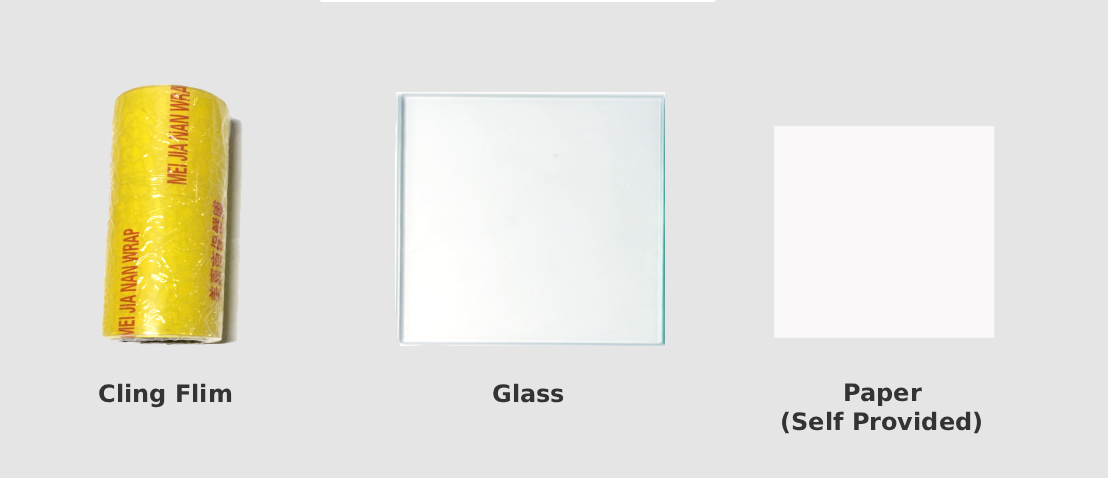
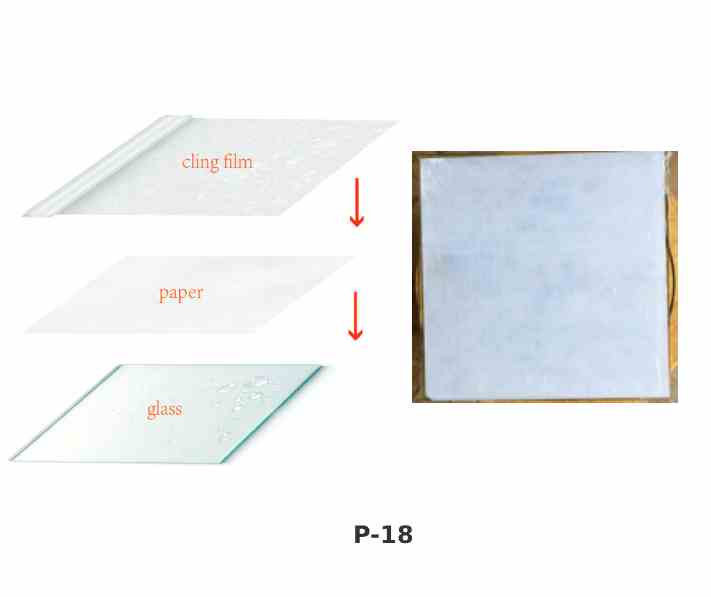
- Print glass processing. (Fig. P-17)
- First, lay the glass flat on the table and sprinkle a small amount of water;
- Lay the paper flat on the glass;
- Finally, attach a layer of cling film and flatten it, making sure that the size of the paper and cling film does not exceed that of the glass.(Fig. P-18)