Slicing Tutorial
- Install the slicing software as per the instructions. After installation, open the slicing software [Simplify3D]. (Figure P-14)
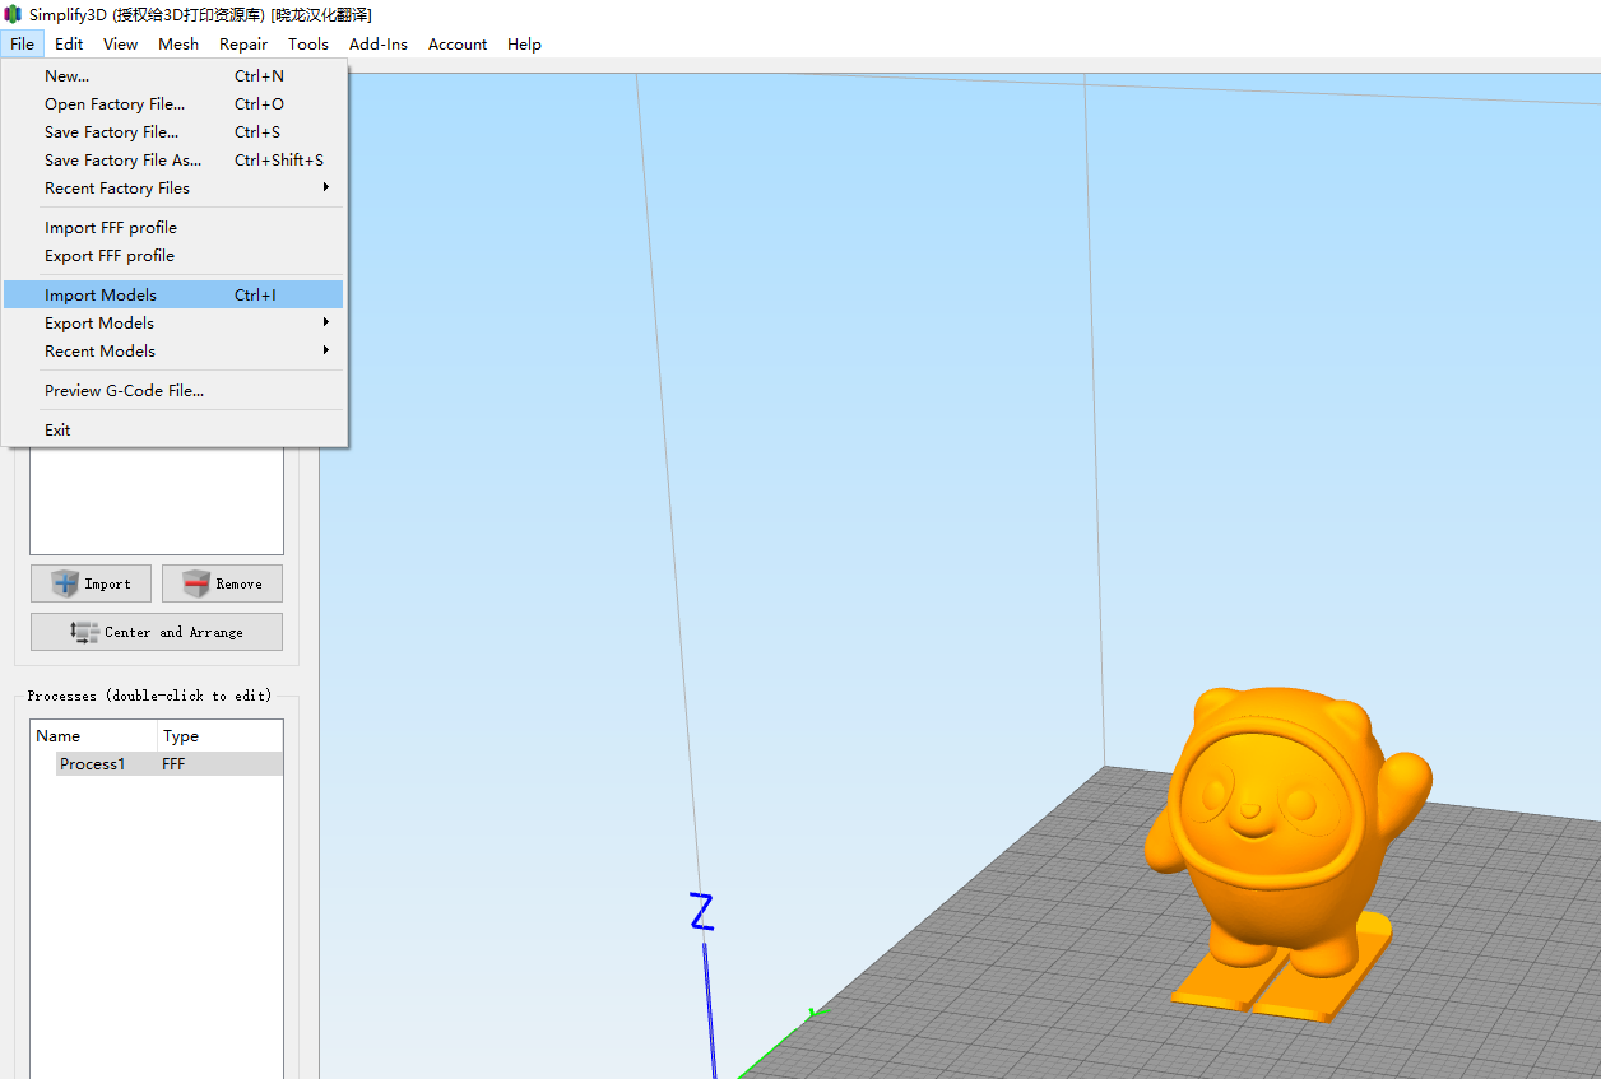
- Click [File] > [Import Model] (or directly drag the model into the software). (Figure P-15)
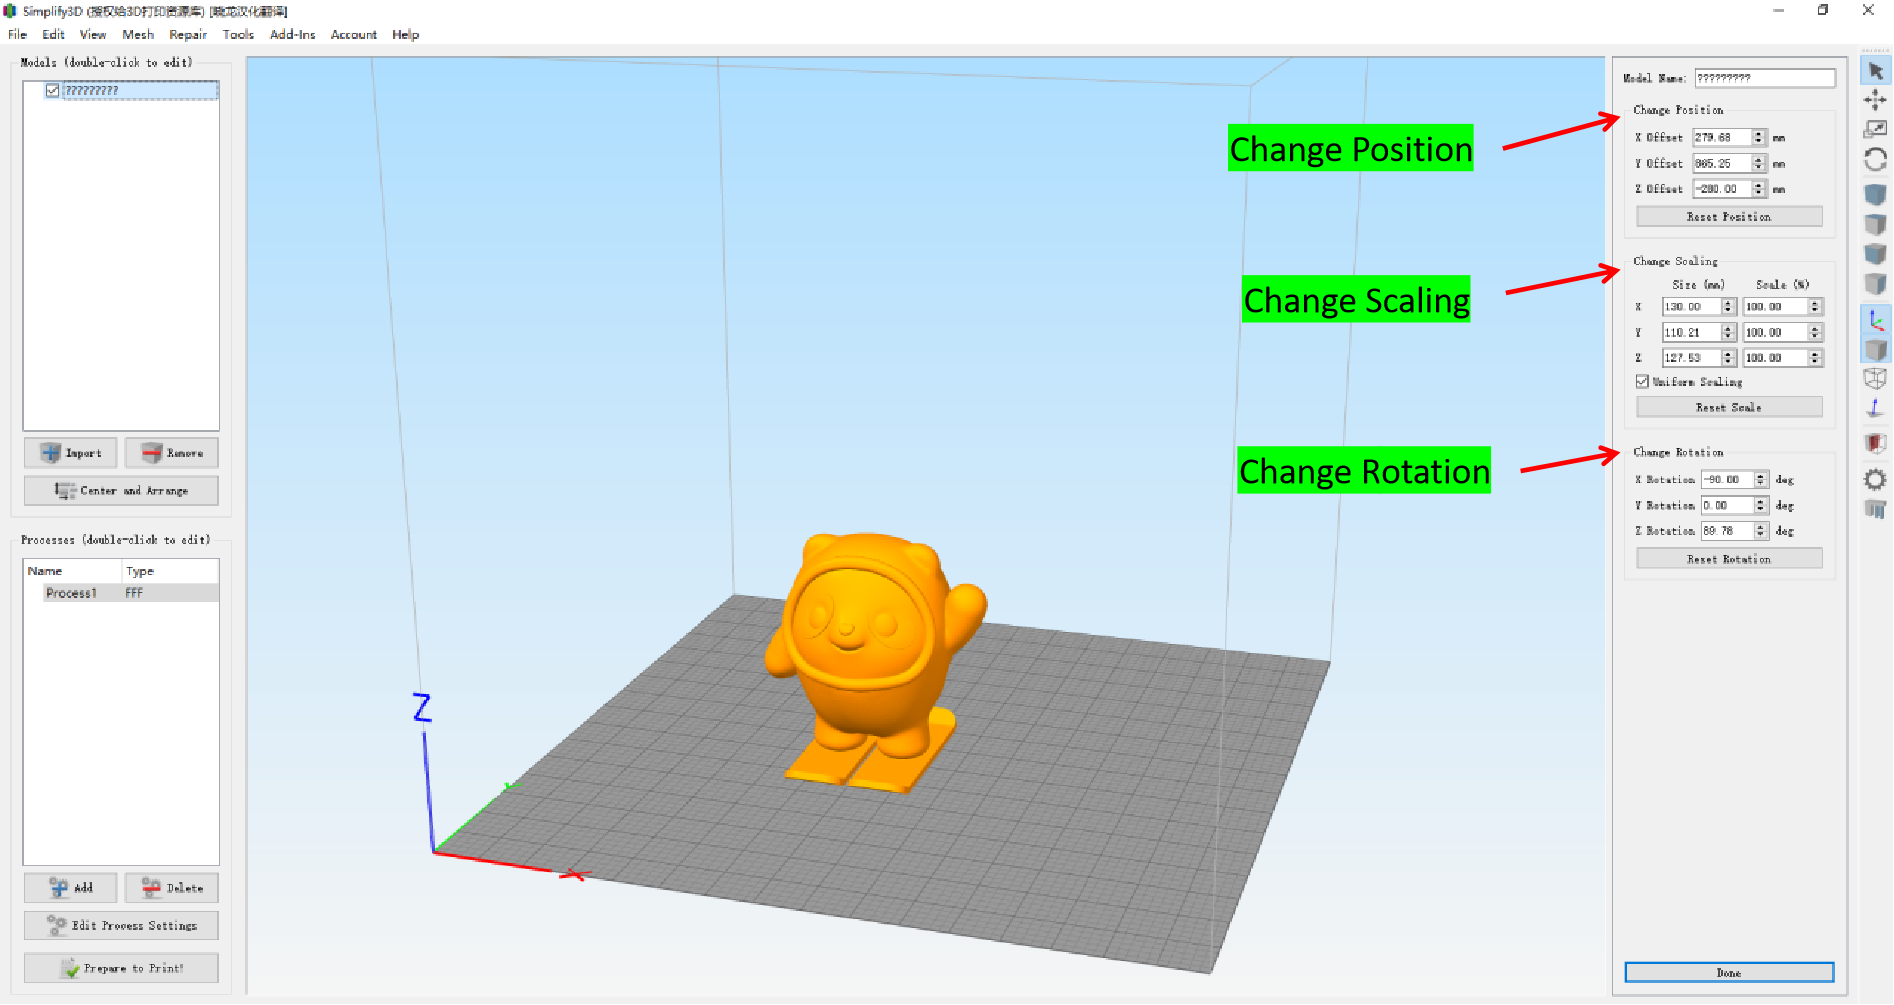
- Double-click the model to adjust its [Position], [Size], and [Rotation] in the newly popped-up menu box on the right. (Figure P-16)
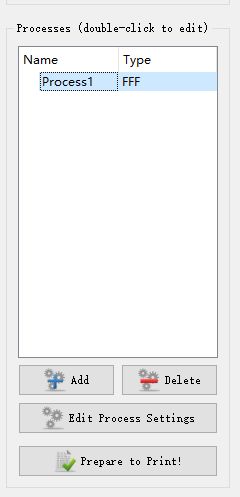
- Click [Edit Process Settings] to set the printing parameters. (Figure P-17)
- In the [Extruder] interface, set the [Nozzle Diameter] (other parameters can be kept as default). (Figure P-18)
- In the [Layers] interface, set the [Layer Height], [Number of Top Layers], [Number of Bottom Layers], and [Number of Shell Perimeters] according to the printing requirements (other parameters can be kept as default). (Figure P-19)
- In the [Fill] interface, set the [Fill Density] according to the printing requirements (other parameters can be kept as default). (Figure P-20)
- After all parameters are set, click [OK]. (Figure P-20)
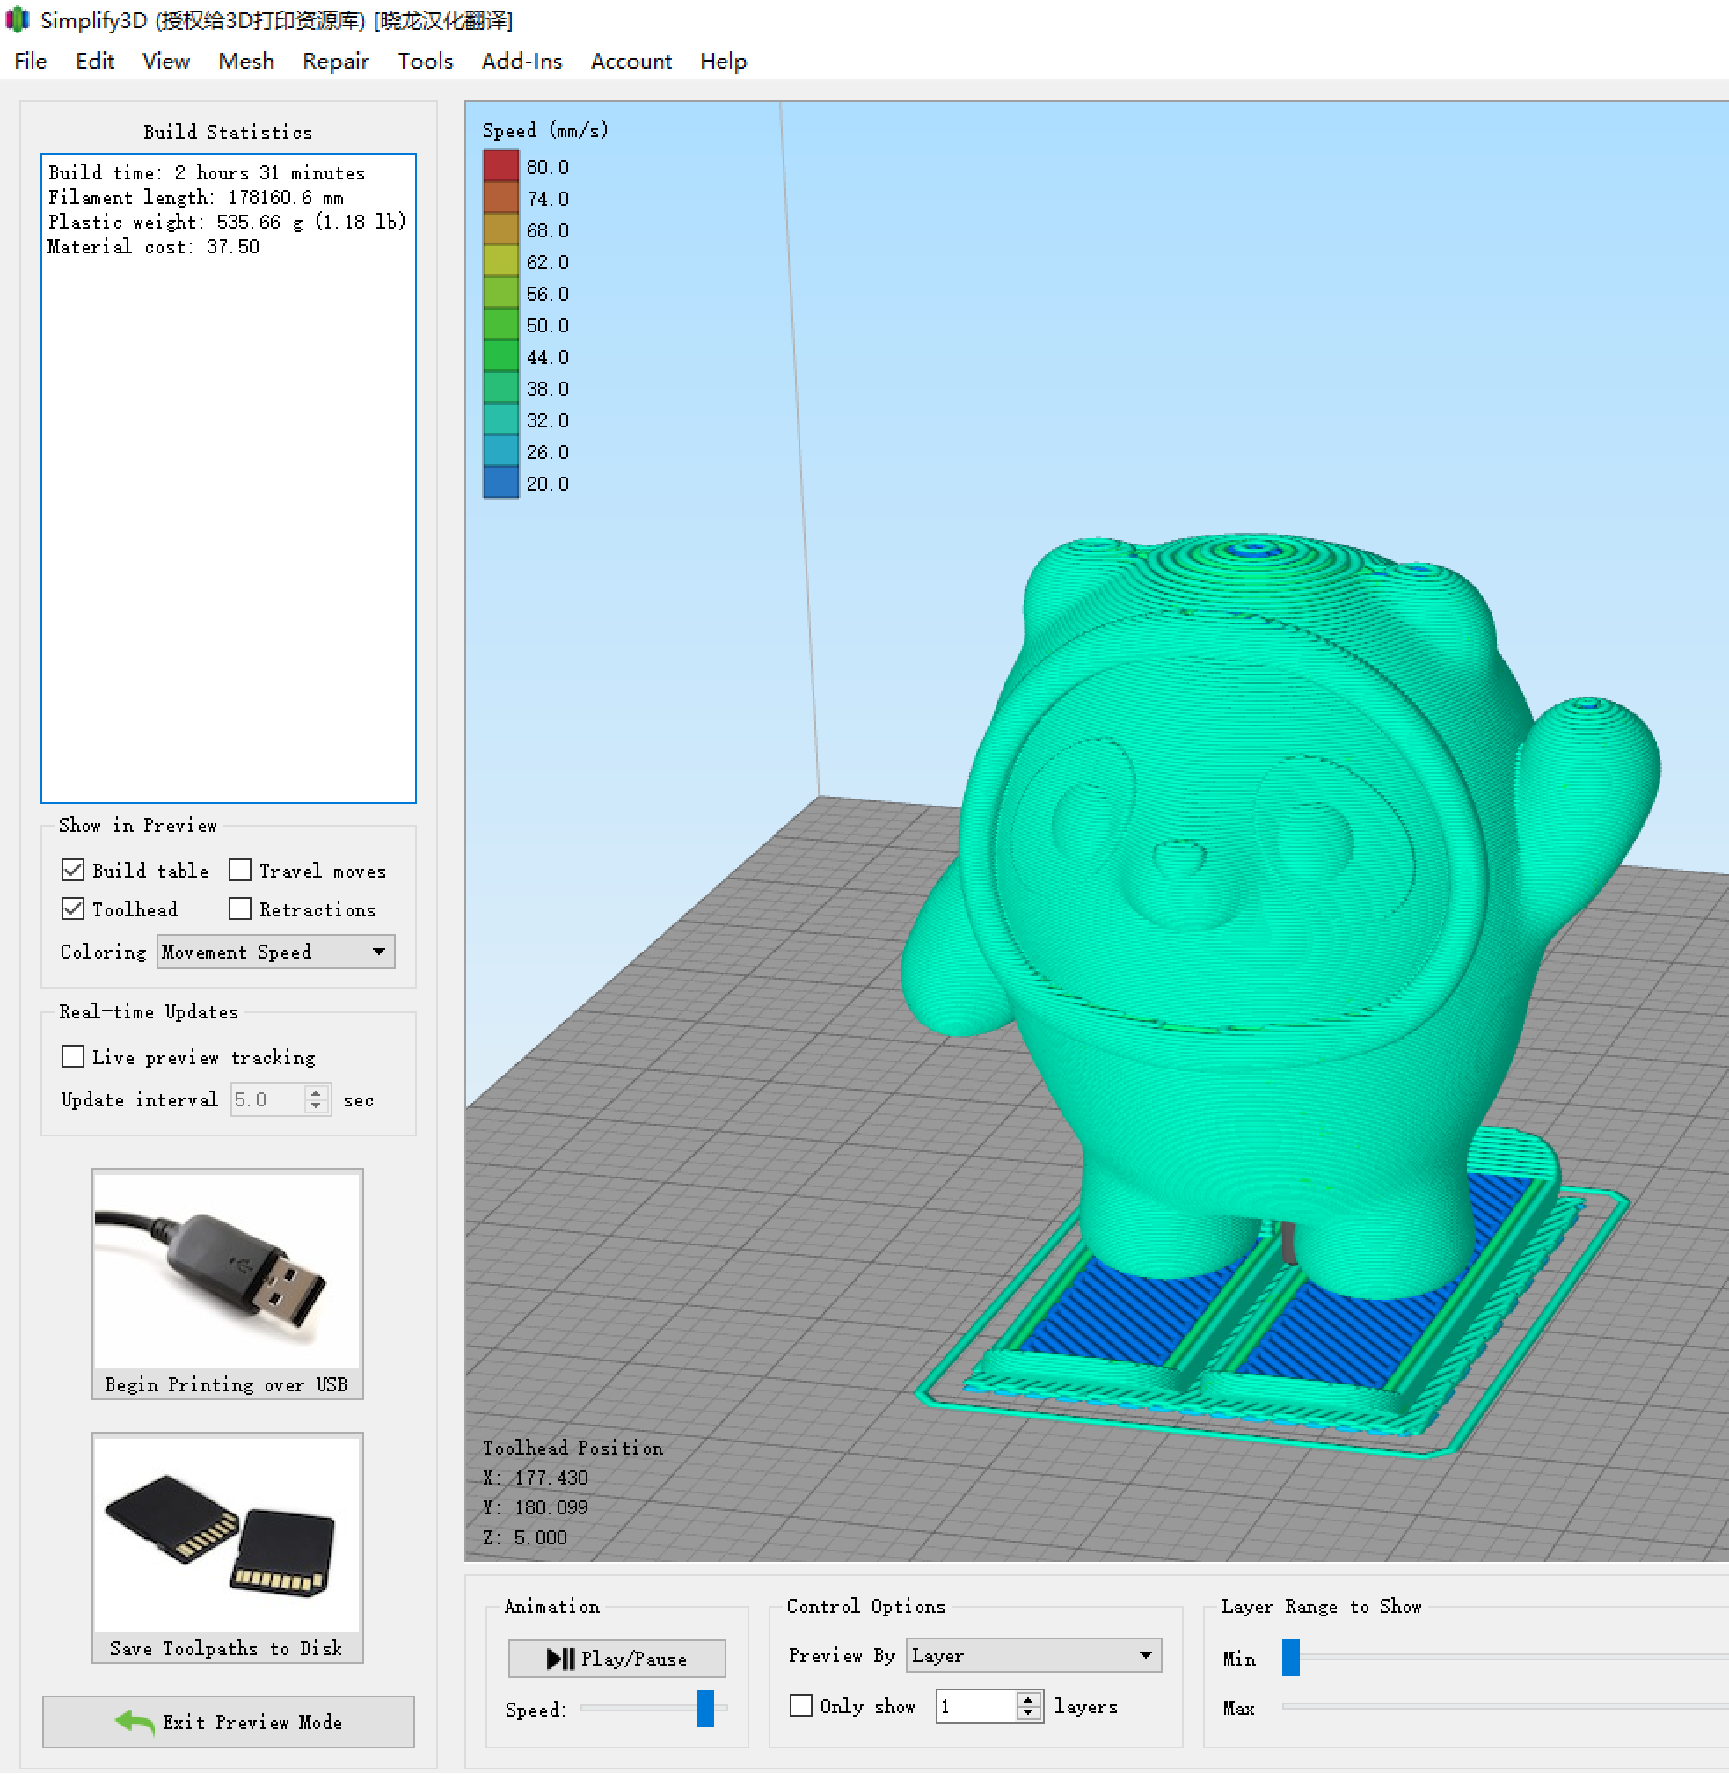
- Click [Prepare to Print] to view the slicing preview. (Figure P-21)
- If there is no problem with the preview, click [Save Sliced File to Disk] to save the sliced file. (Figure P-22)

P-14
P-15
P-16
P-17
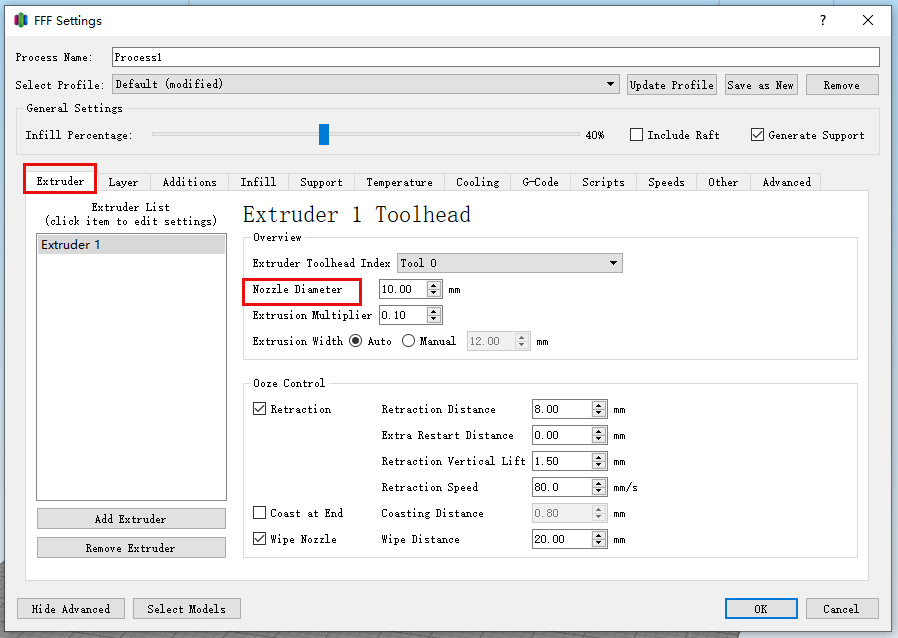
P-18
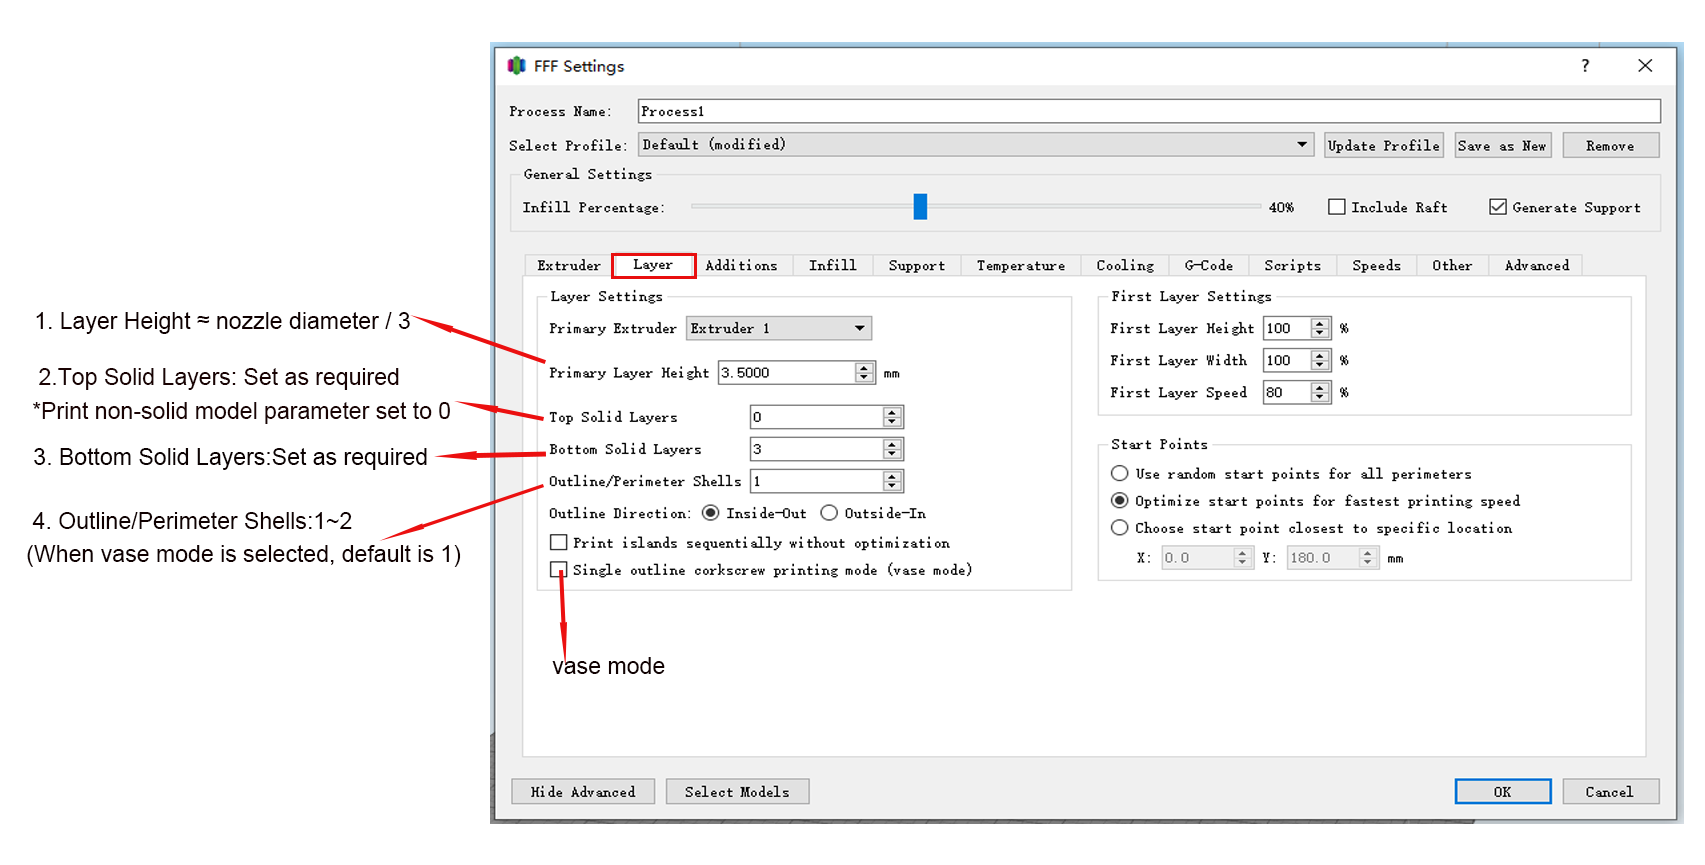
P-19
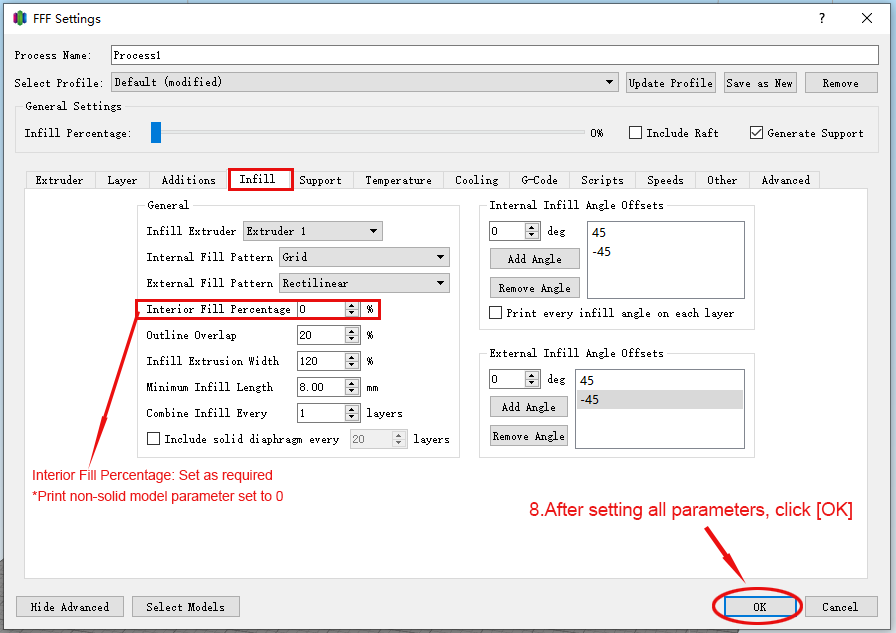
P-20
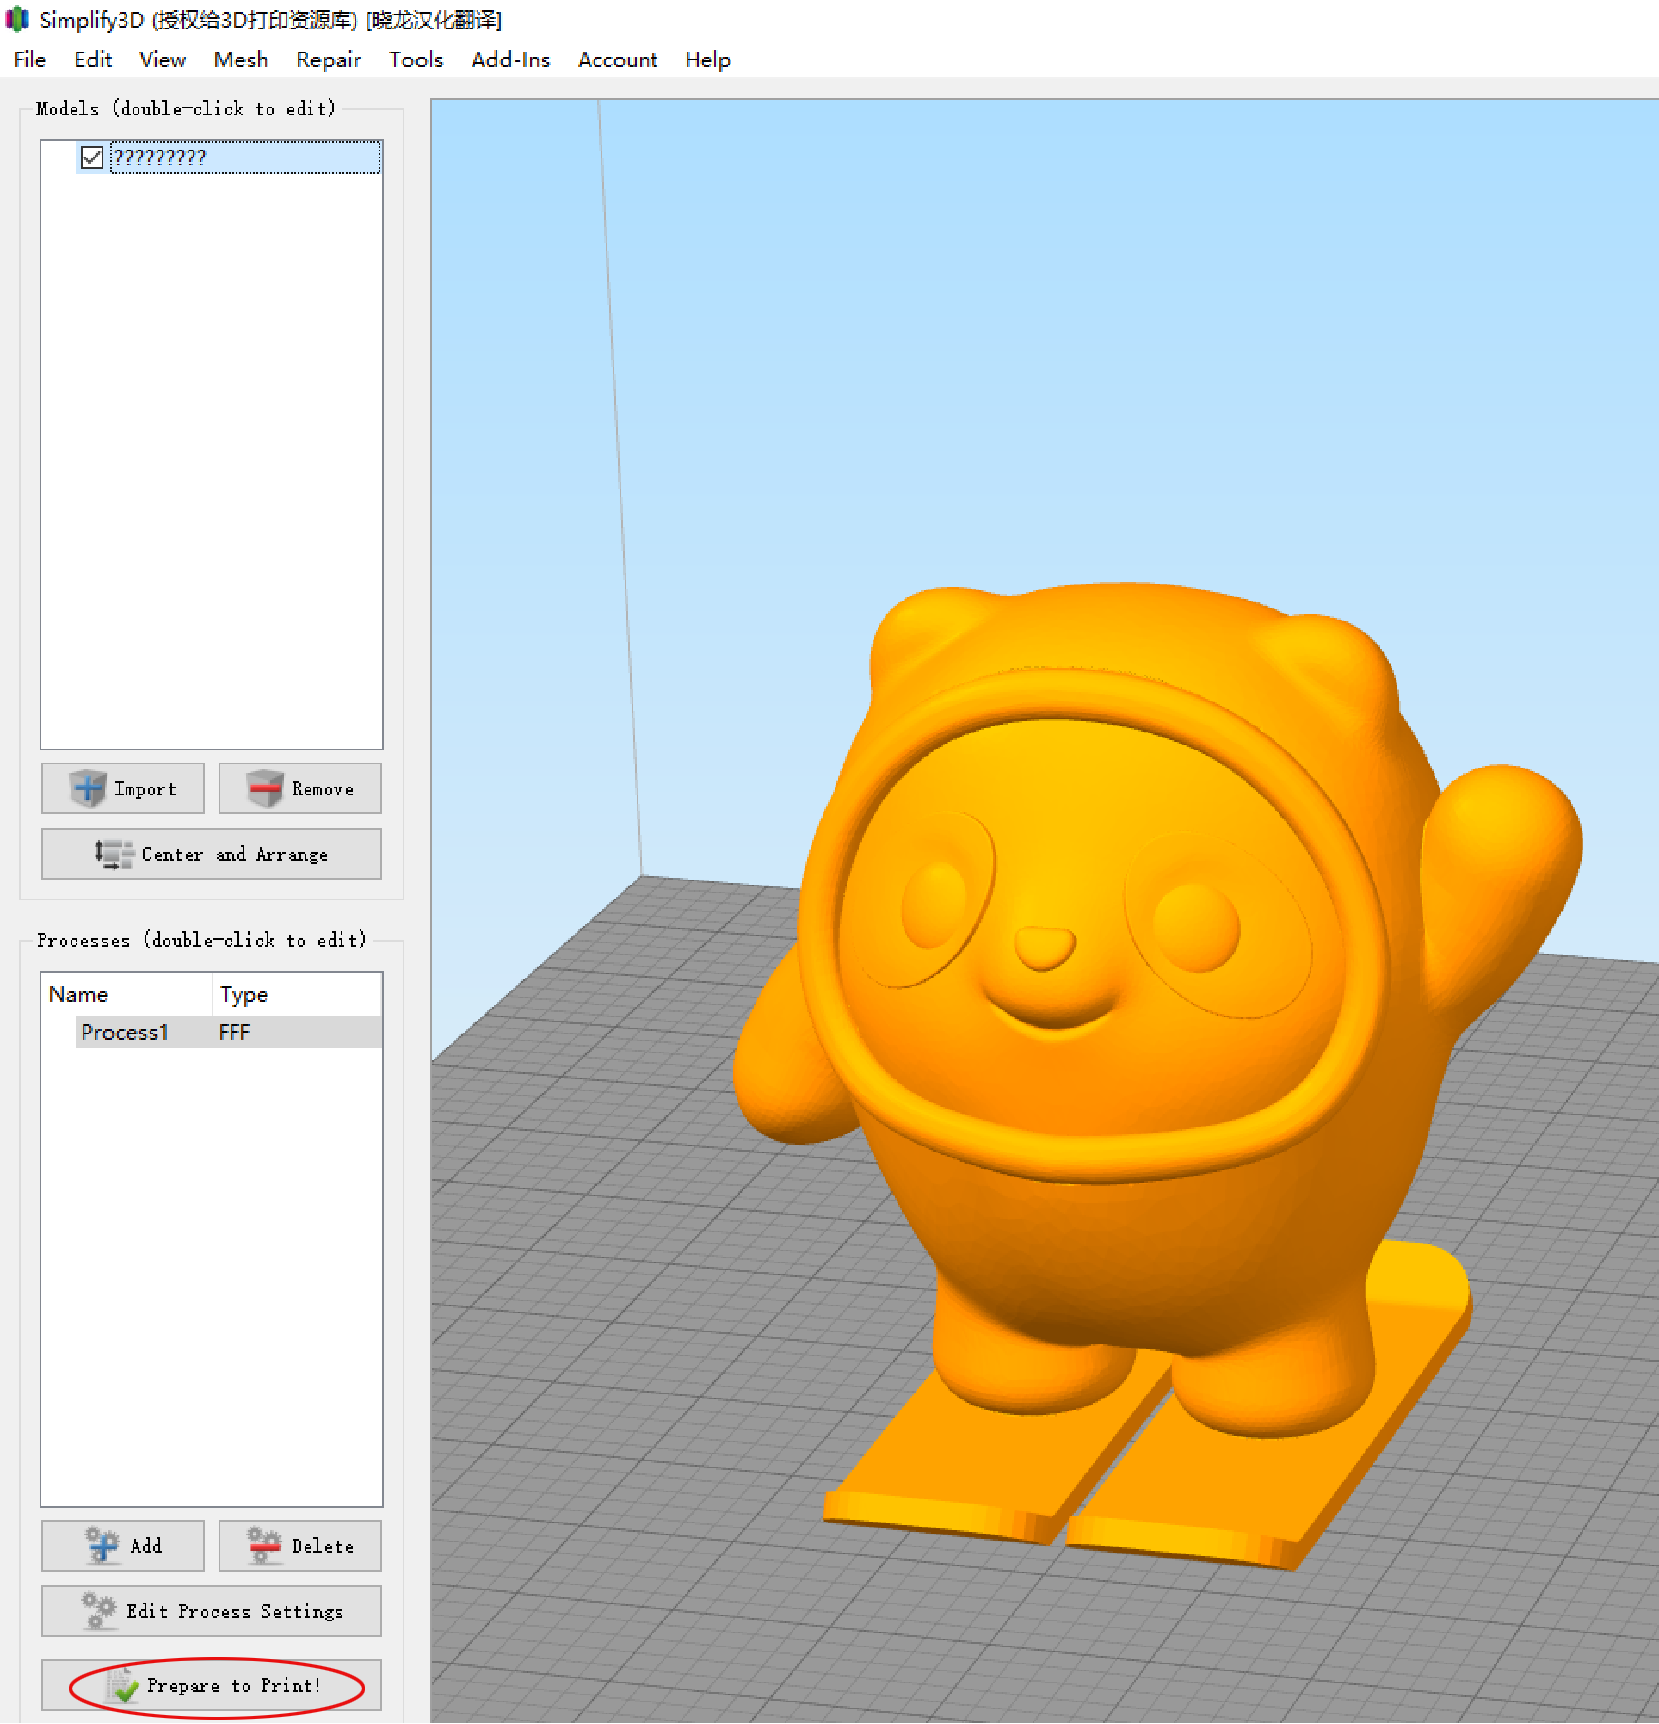
P-21