Concrete 3D Printer Printing Operation
- 1. Apply power to start the equipment (Figure P-5)

P-5
- 2. In Control Panel, click [Print] and select the filename to be printed (Figure P-6)
- *To print documents, insert a USB drive or connect the device to a computer via wireless network for file transfer
.jpg)
P-6
.jpg)
P-6
.jpg)
P-6
.jpg)
P-6
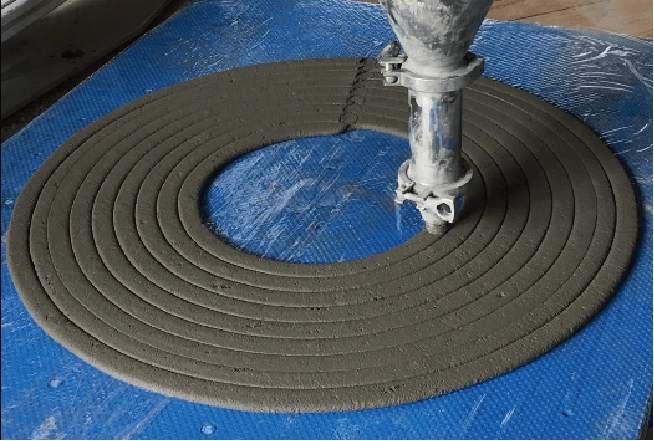
- Add the clay into the extruder (manual feeding or pump unit feeding optional) and monitor the printing process. (Figure P-7)
.png)
Manual feeding
.png)
Pump Unit Feeding
- During printing, parameters can be adjusted in real-time based on print status. Select [Fine-tune] to adjust [Extrusion Rate] + [Print Speed] settings. (Refer to Figure P-8)
.jpg)
.jpg)
- 5. When the clay strip can be extruded continuously, stop printing. After cleaning the clay on
the platform, follow the above steps to restart formal printing. (Figure P-9)
- *Intermittent extrusion indicates potential insufficient clay in the extruder. Maintain clay supply until continuous flow resumes.
- *If the clay strips do not form properly, please adjust the material formula.
- Wireless print setting
-
1. Connect the equipment to a wireless network. Upon system startup, navigate
to Control Panel → [More Settings] → [Network]. - *To print from the computer end, connect the device and the computer to the same wireless network. (Figure P-9)
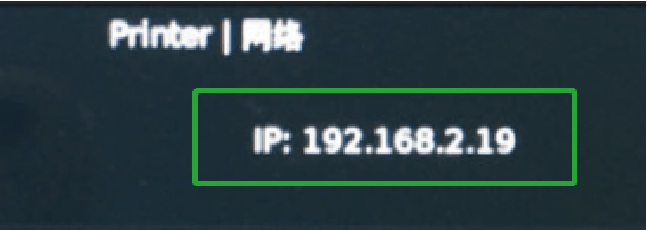
- Please note that on the interface for selecting the connection network, there is the IP address of the current device. This will be needed when operating on the computer side. Please pay attention to it. (Figure P-10)
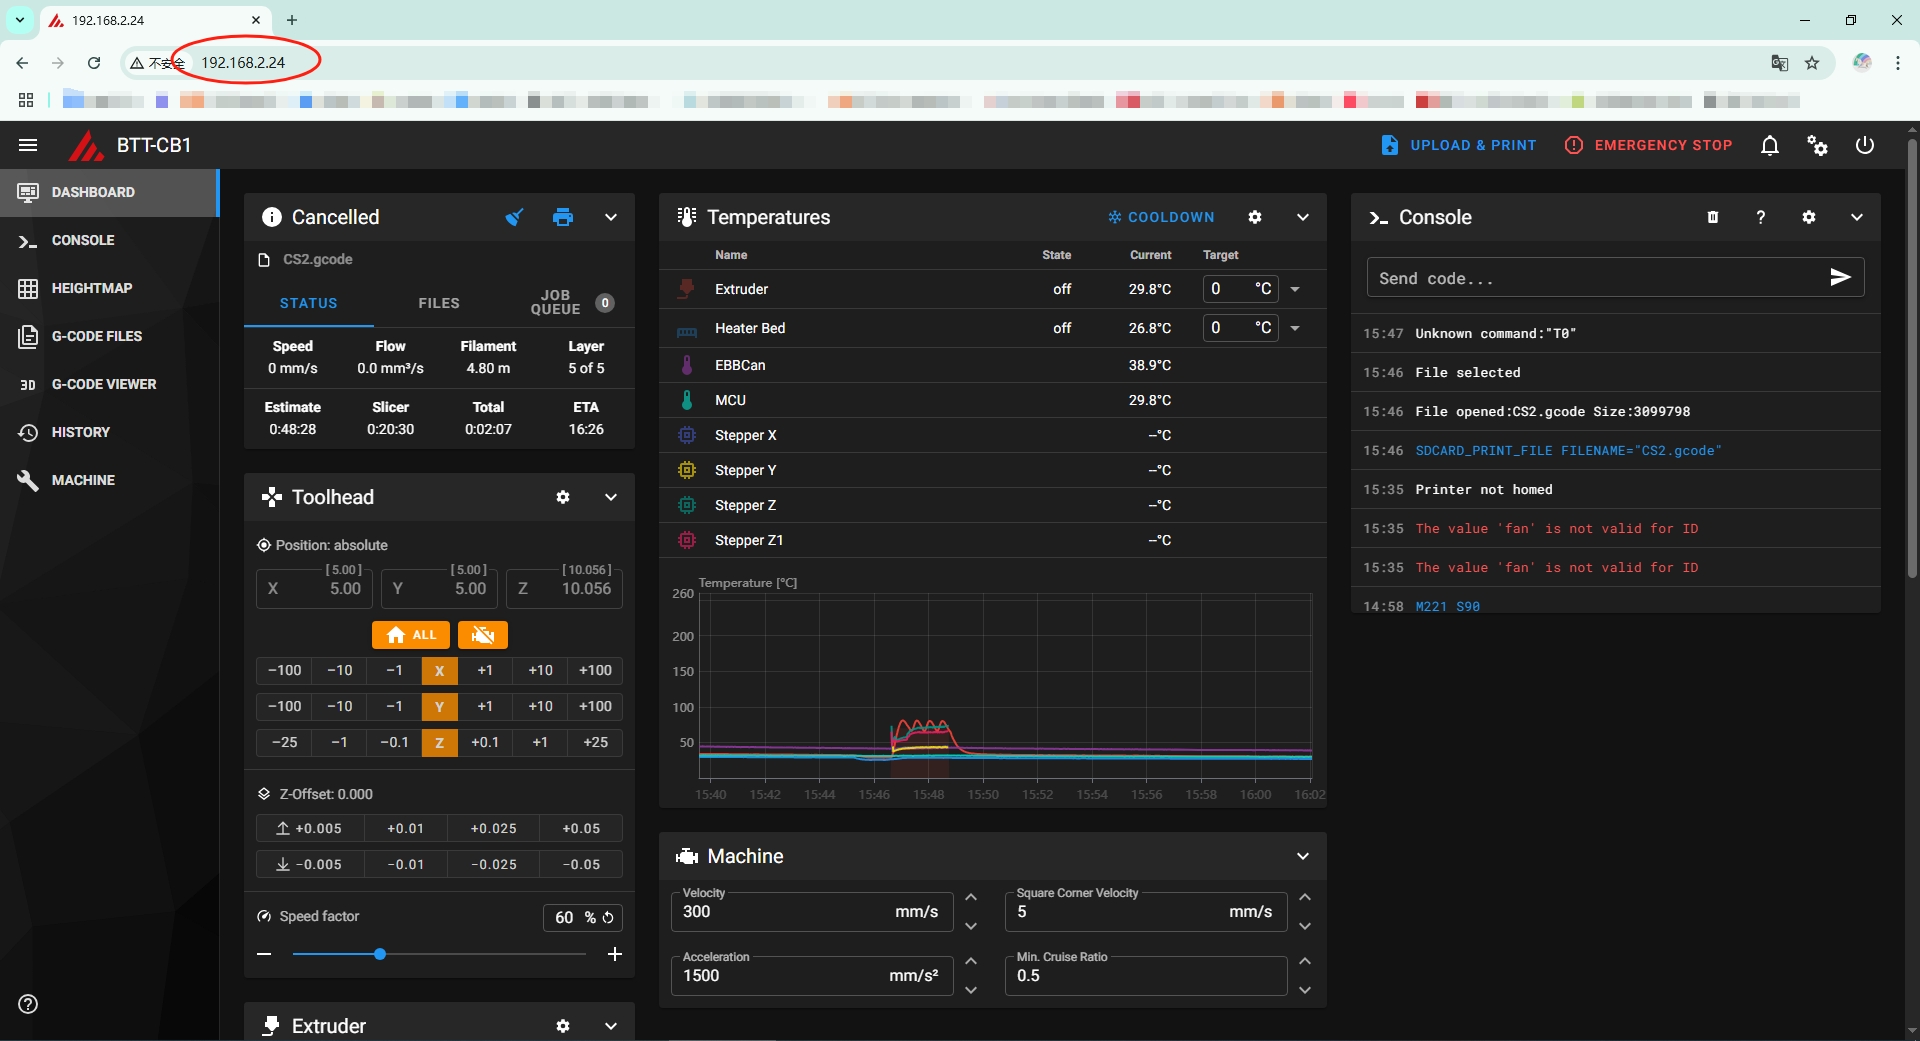
- Enter the device's IP address in the browser of the computer to access it. (Figure P-11)
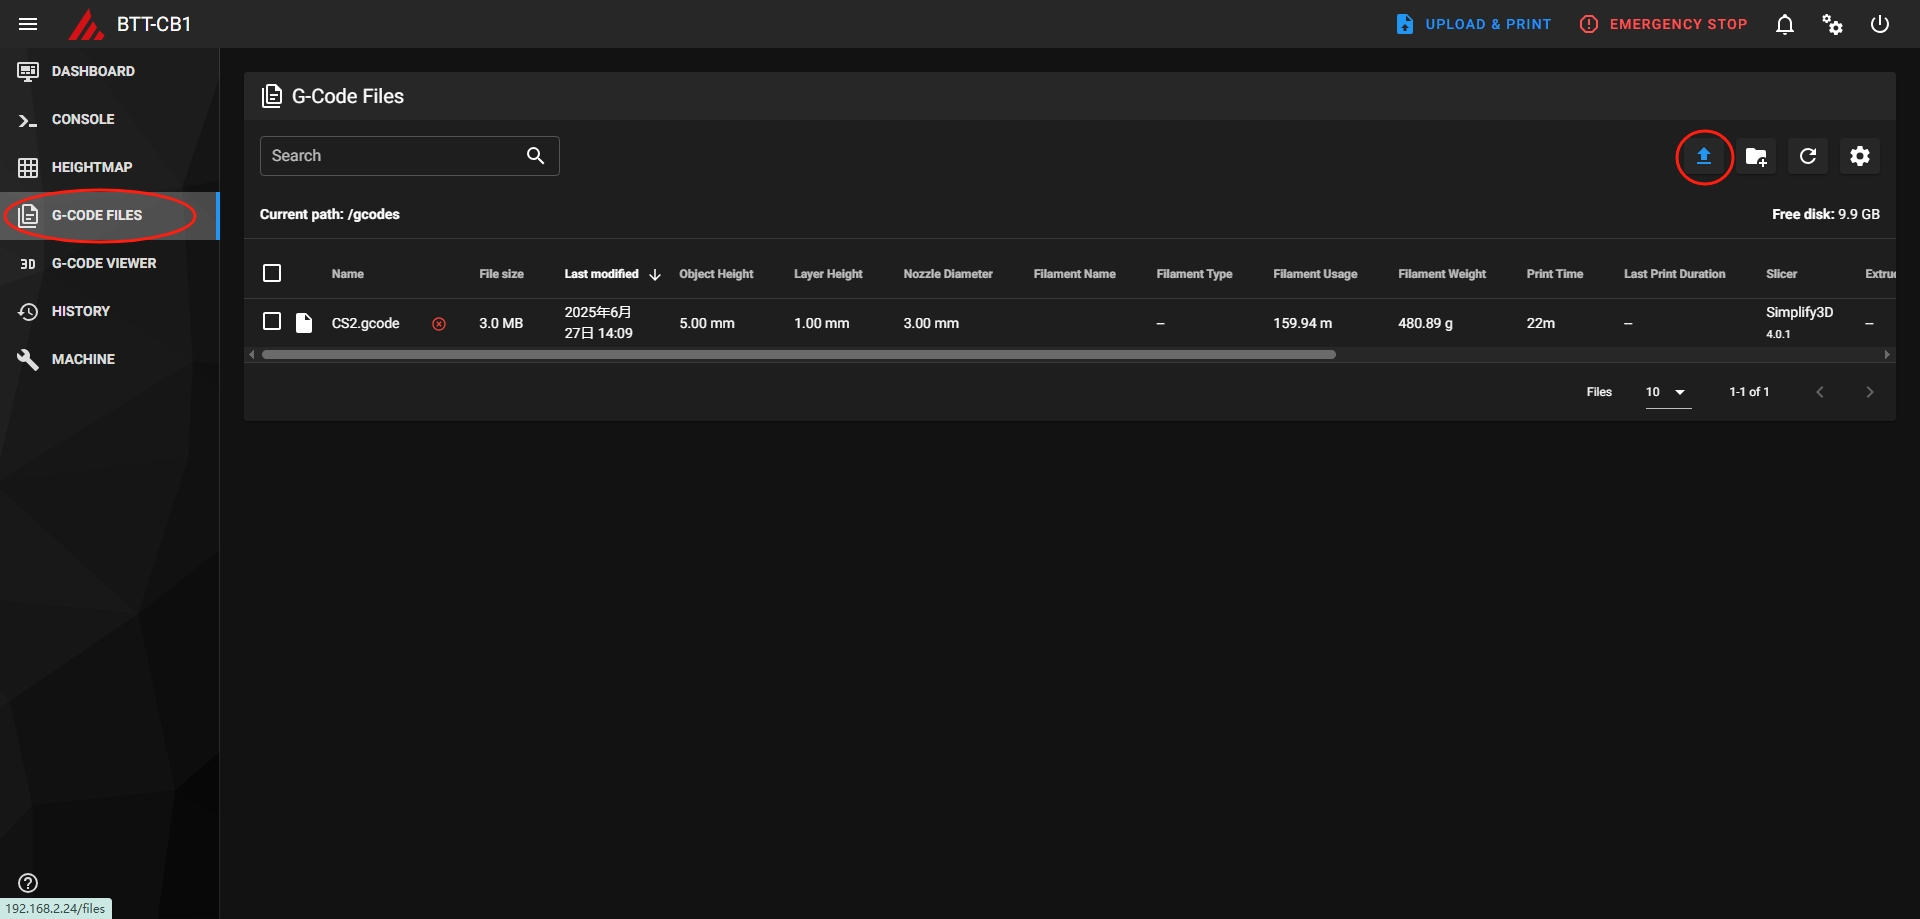
- Access the [G-CODE] interface in the left menu bar and upload the target model file for printing. (Figure P-12)
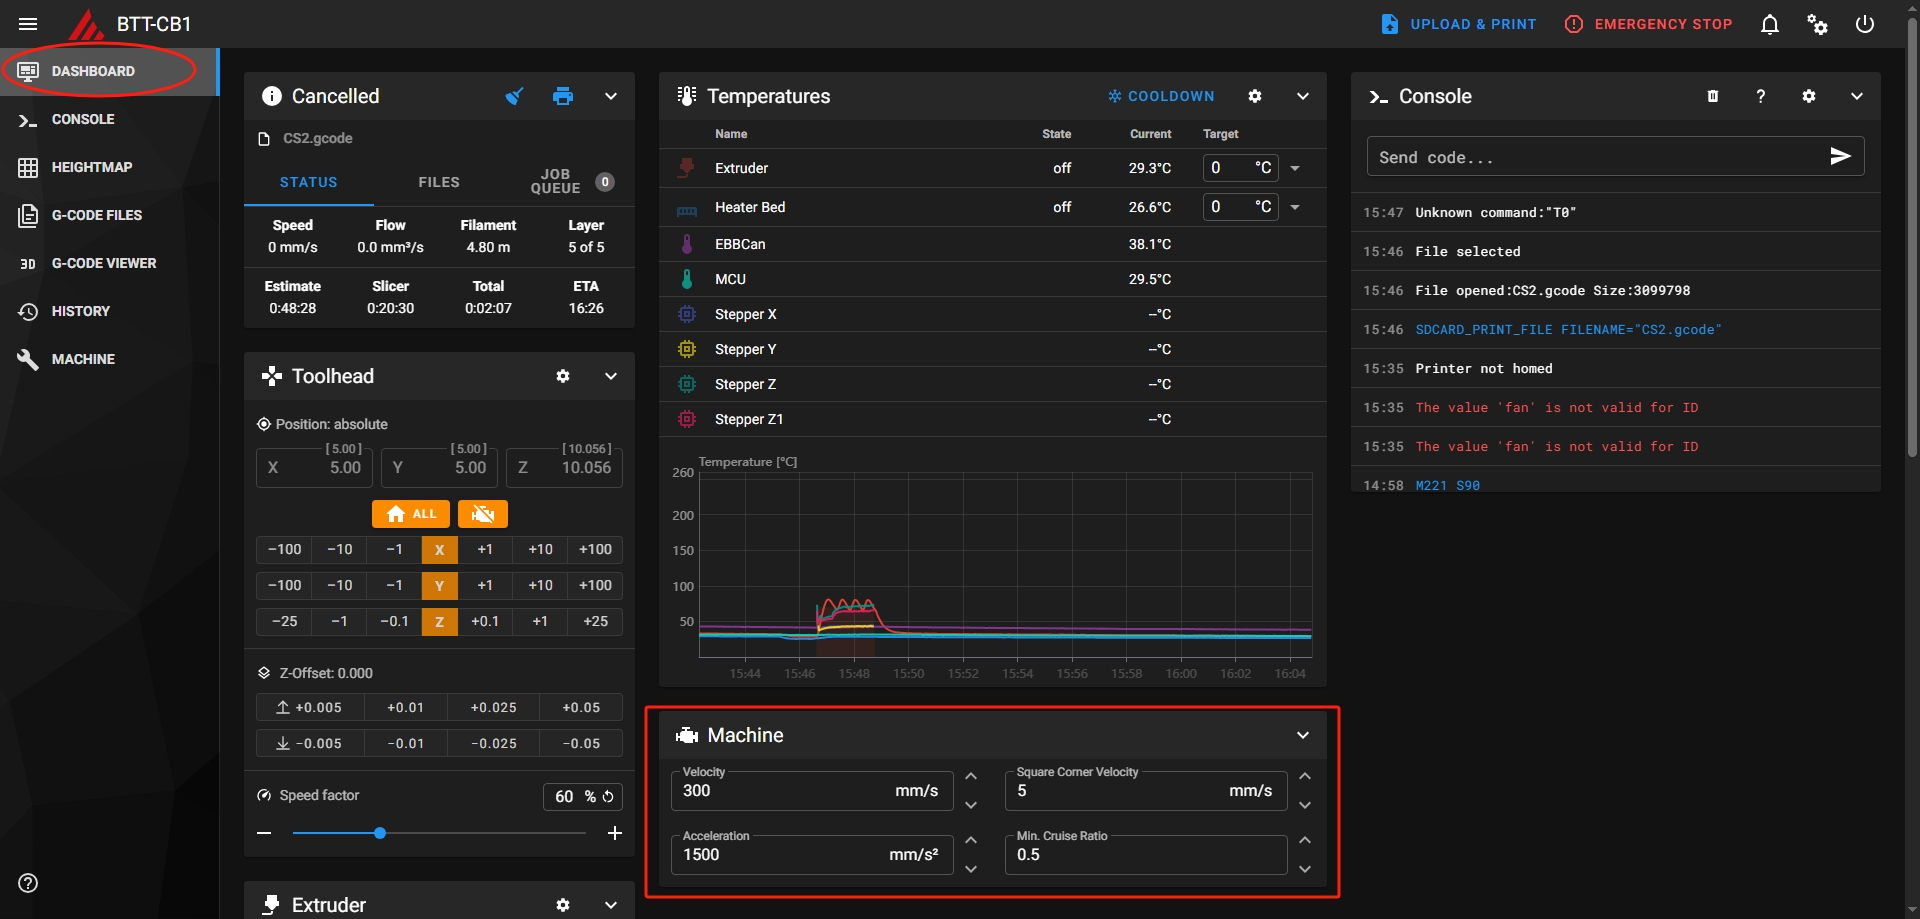
- On the [Control Panel] interface, it can also make real-time adjustments to the parameters during the printing process. (Figure P-13)
.jpg)
.jpg)
.jpg)