How to Replace the Silicone Tube of Clay 3D Printer Extruder
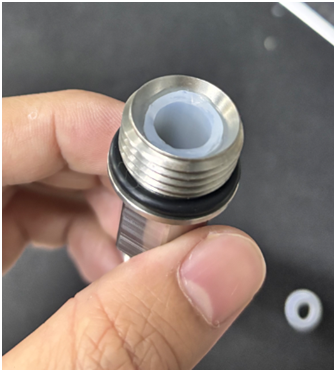
- Power off the clay 3D printer first, then unscrew the metal connector at the bottom of the extruder. (P-6)
- Cut a new silicone tube to the exact same length as the removed metal connector. (P-7)
- Fully insert the cut silicone tube into the metal connector to ensure a tight fit without looseness. (P-8)
- Take the thinnest size of hex key, insert it into the gap between the silicone tube and the metal connector and gently pry open the gap; drop a drop of special glue into the gap, then repeat the gluing process in two other directions (one drop for each direction). After gluing, let it stand for 1-12 hours until the glue fully cures and bonds firmly. (P-9)
- Trim the excess silicone tube and overflowed glue on the outside of the connector neatly with a blade to complete the operation. (P-10 P-11)
- Warm Reminder
- Keep the device powered off throughout the operation to avoid accidental startup;
- It is recommended to use industrial-grade heat-resistant and wear-resistant glue to improve the bonding stability between the silicone tube and the connector;
- Do not touch the connector before the glue cures to prevent bonding misalignment.
P-6
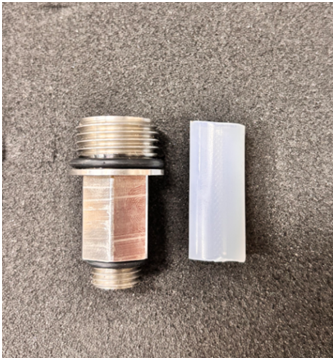
P-7
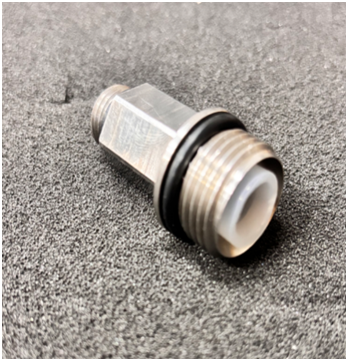
P-8
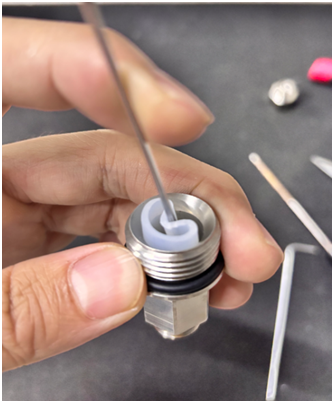
P-9
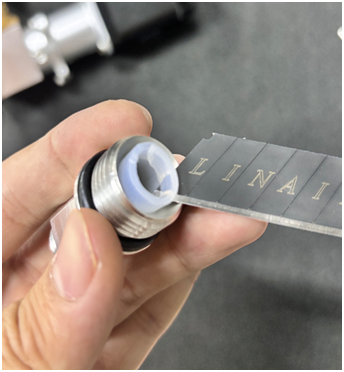
P-10